Based on years of experience delivering IoT development services, we can say that the massive data streams that are produced by IoT devices can be efficiently processed using flow-based programming. This approach allows for the interconnection of multiple IoT devices, creating a flow between them and, thus, the ability to exchange data across predefined connections and networks.
Thanks to the capabilities of cloud technologies, this approach can facilitate the processing of deep real-time telemetry data pools. Such a solution can be especially useful in asset-intensive industries such as logistics and transportation, automotive, agriculture, utilities, oil, gas, and manufacturing.
This article outlines how you can learn to build IoT telemetry simulators for Azure and Amazon cloud platforms using the Node-RED tool. This flow simulator can be used for sending telemetry data to the Azure IoT hub and Amazon IoT at the same time.
How to use the Node-RED library for building telemetry data flows
Before you start with development, you need to configure your devices in the Azure IoT hub and the AWS IoT. Use the guidelines provided by Microsoft and Amazon; the links are available for your convenience. Should you have any questions at this point, feel free to leave a comment below.
So, why should you use the Node-RED tool here? It offers a simple way to build quick flows that integrate with different IoT hardware devices and sensors, APIs, and online services. At the moment, Node-RED has more than 200,000 modules in its package repository.
The big advantage of using this tool is that you can run it at the edge of the network using low-cost hardware and cloud capabilities. Moreover, Node-RED provides a browser-based editor that allows it to easily wire together data flows using a wide range of nodes.
Using Node-RED, you can:
- Run your flows locally using both options: a laptop or a docker.
- Run your flows on various devices, including Arduino, Raspberry PI, etc.
- Run your flows on the cloud of any provider, Amazon, Azure, or Google.
Let’s create a flow like the one shown below.
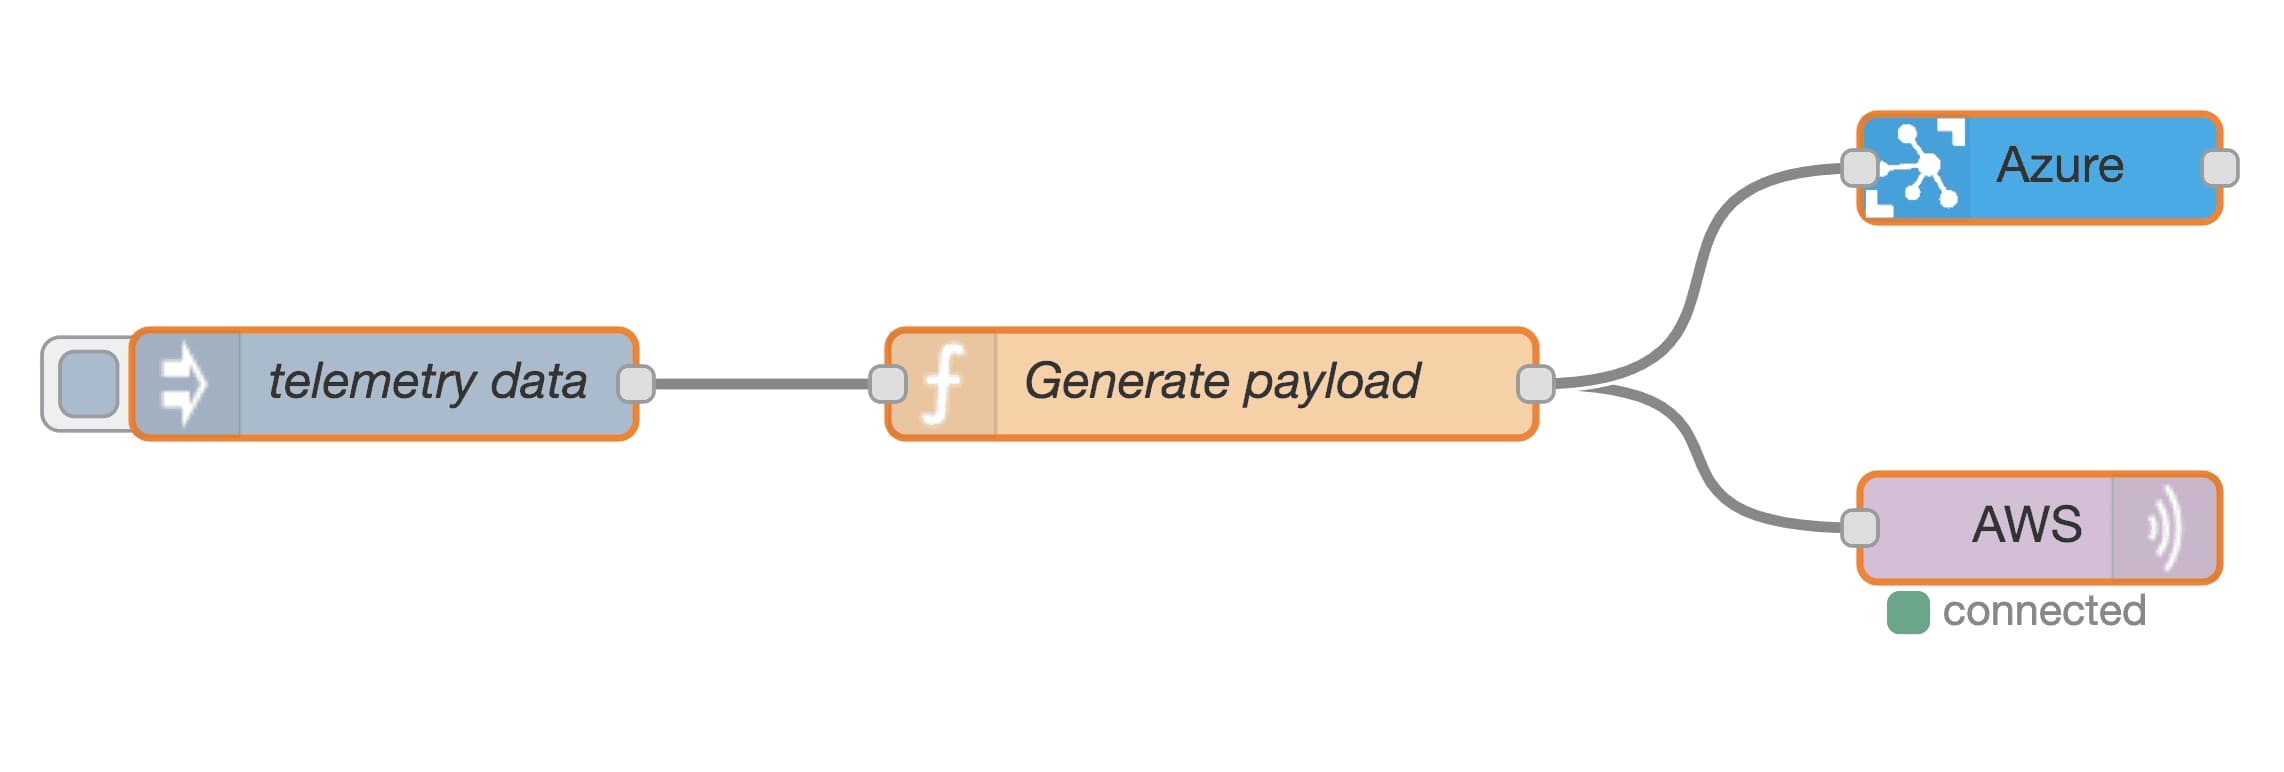
Node-red library flow creation example
In this flow, the following nodes were used:
- A node that injects a message into a flow either manually or at regular intervals. The message payload can be of various types, including strings, JavaScript objects or the current time.
- A JavaScript function block to run on the messages that are received by the node.
- A simple node that sends the message payloads to Azure IoT Hub.
- A node that connects to an MQTT broker and subscribes to messages from the specified topic.
Let’s take a closer look at each node.
The injection node
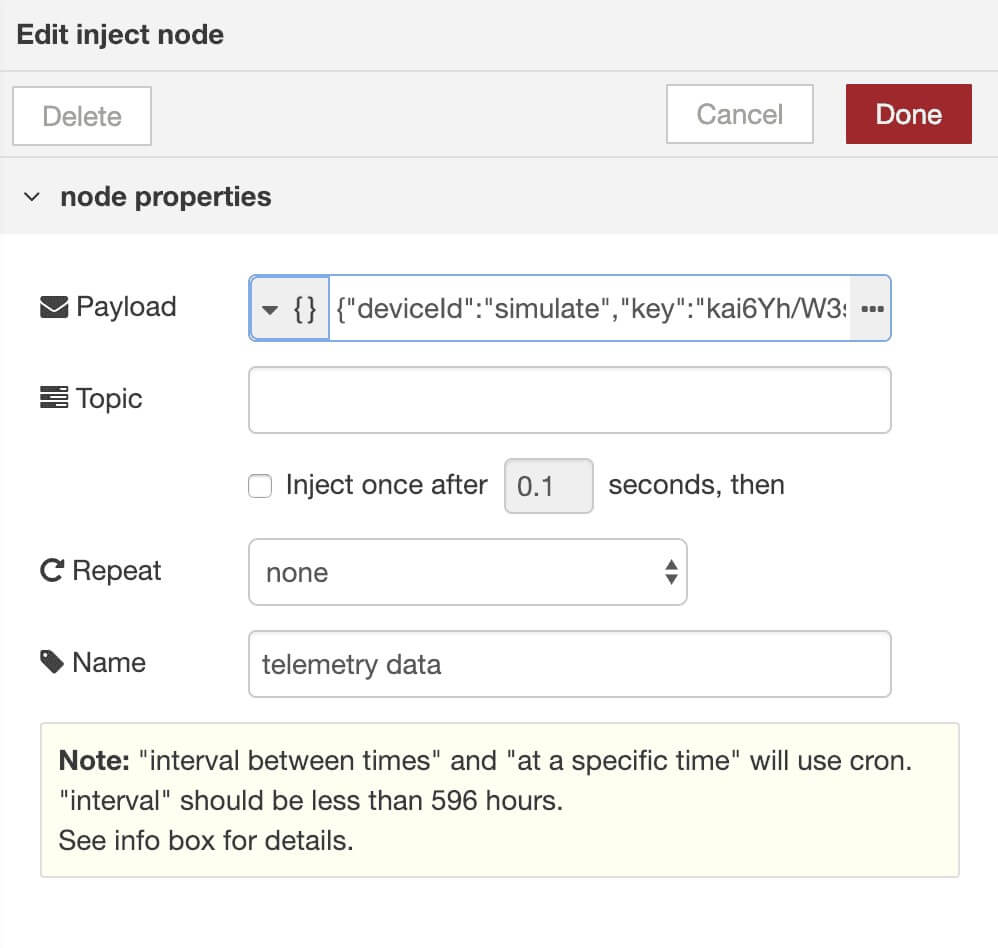
Node-red library the injection node properties
The payload file type should be JSON. For Azure IoT hub the message needs to look like this:
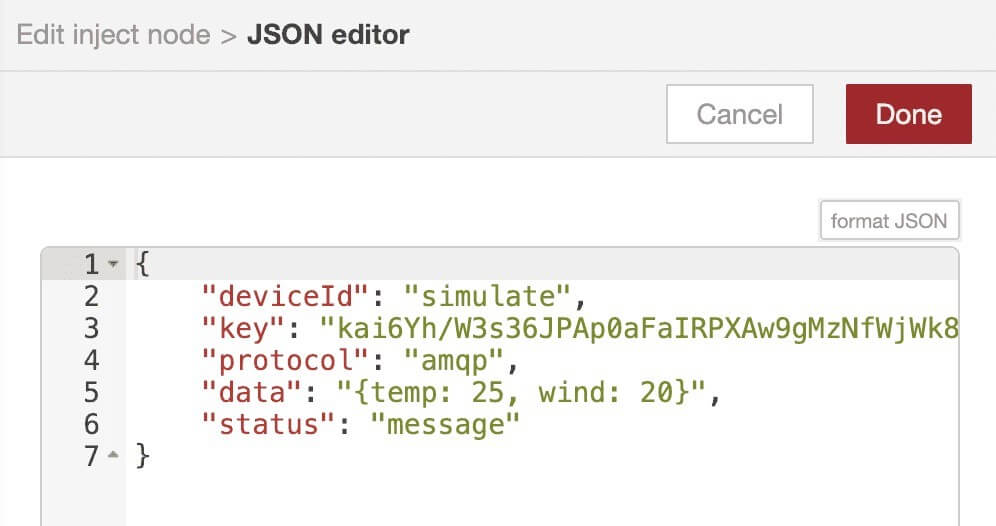
The sample of telemetry message
- The “deviceId” is your device’s unique id.
- The “key” is your device’s primary or secondary key.
- The protocol options are: amqp, amqpws, mqtt or HTTP.
- Data can either be a plain string or a string wrapped JSON.
The function node
The message is passed in as an object called msg. By convention, it will have an msg.payload property containing the body of the message.
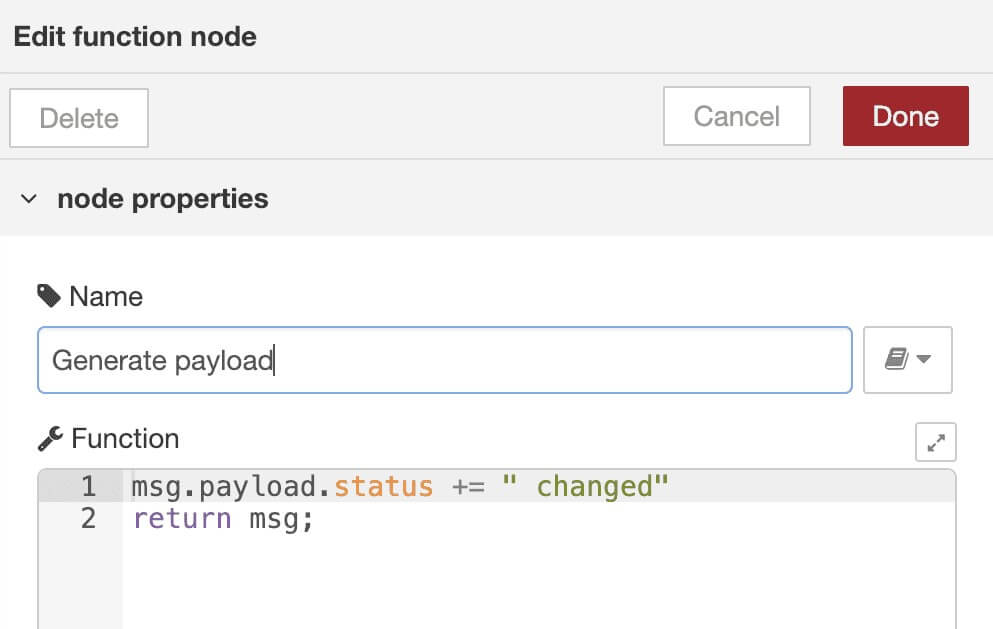
Function node properties
Azure IoT hub
In this node, you need to add the name of your Azure IoT hub. Do not forget to select the protocol type — it should be amqp. This node is not installed by default. You need to execute several steps described here.
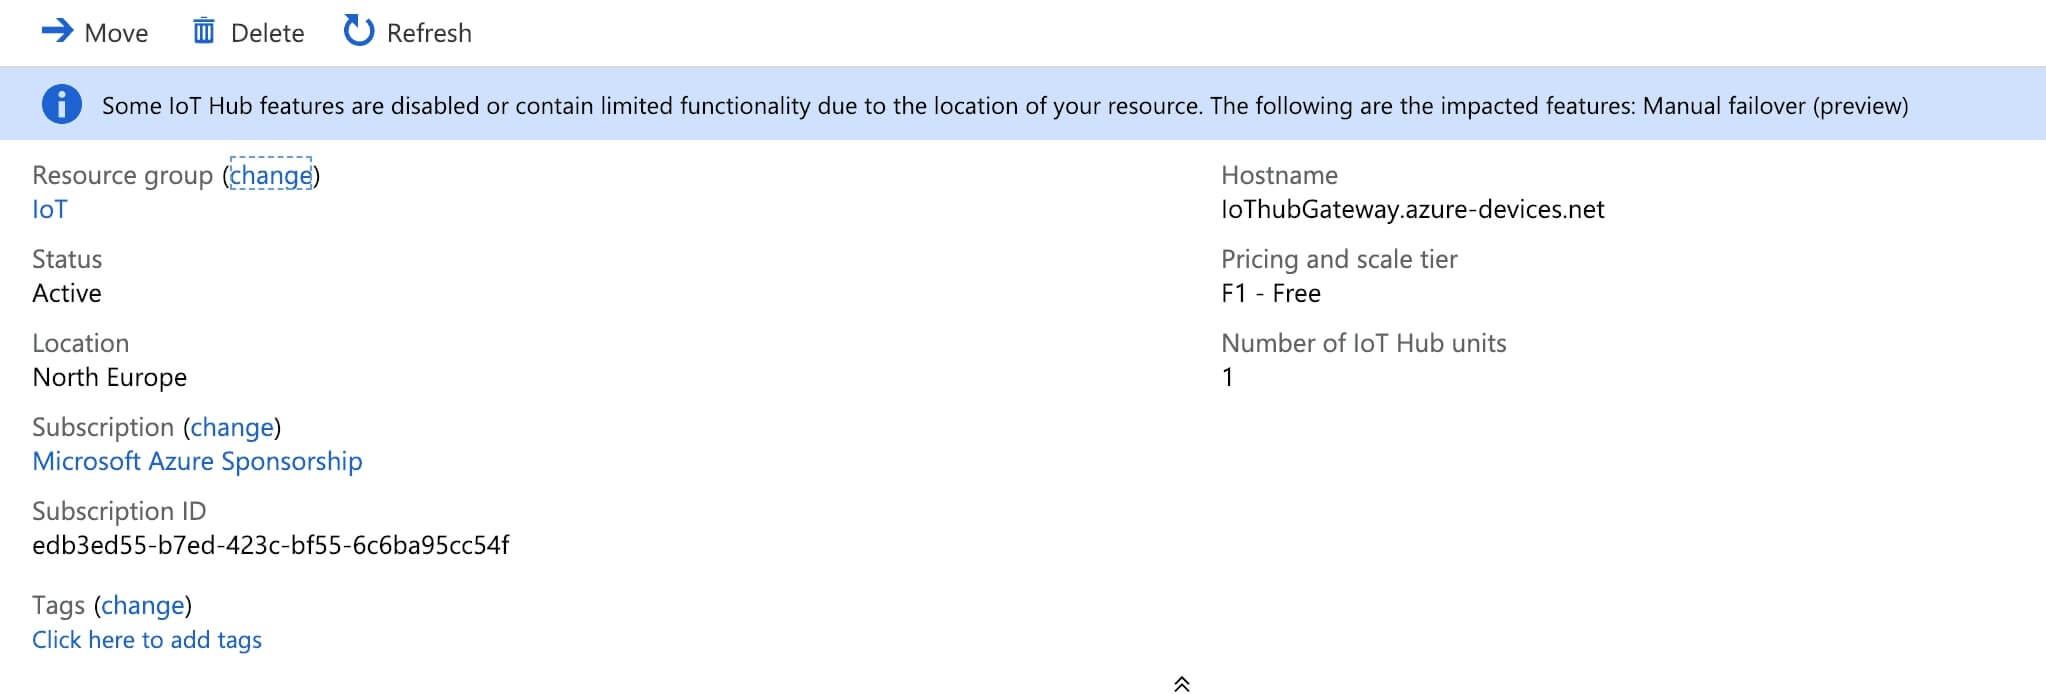
The overview of the Azure IoT hub
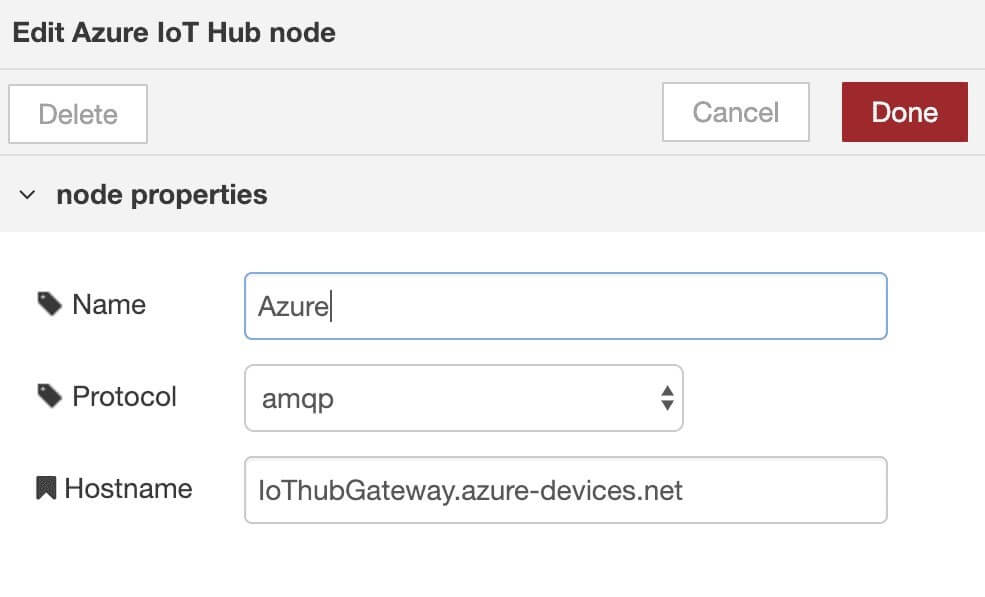
Azure IoT hub node properties
MQTT node
This node requires the connection to the MQTT broker to be configured. First, you need to configure the server endpoint.
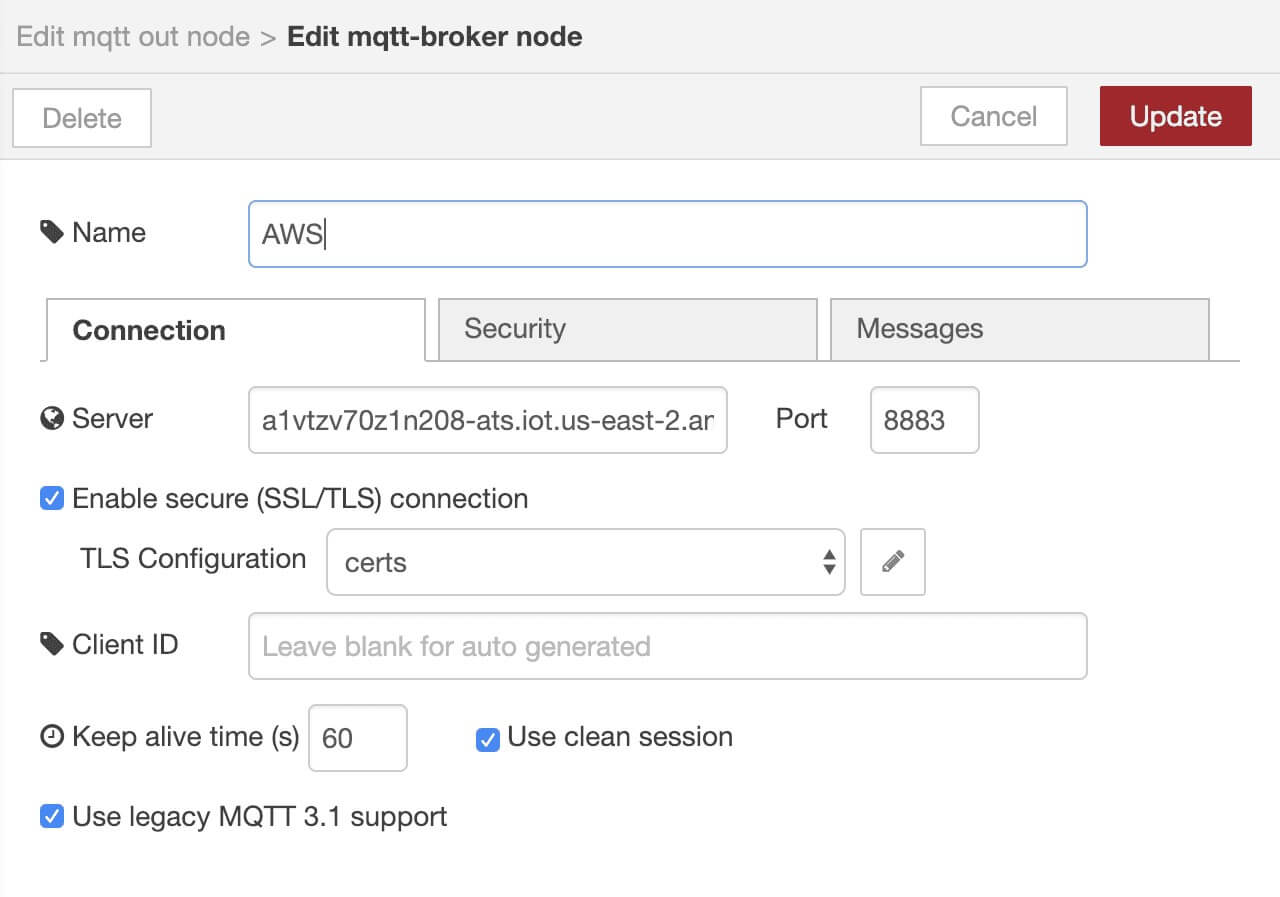
MQQT broker connection properties
You need to add the connection address of your AWS IoT. After that, you should configure the certificates.
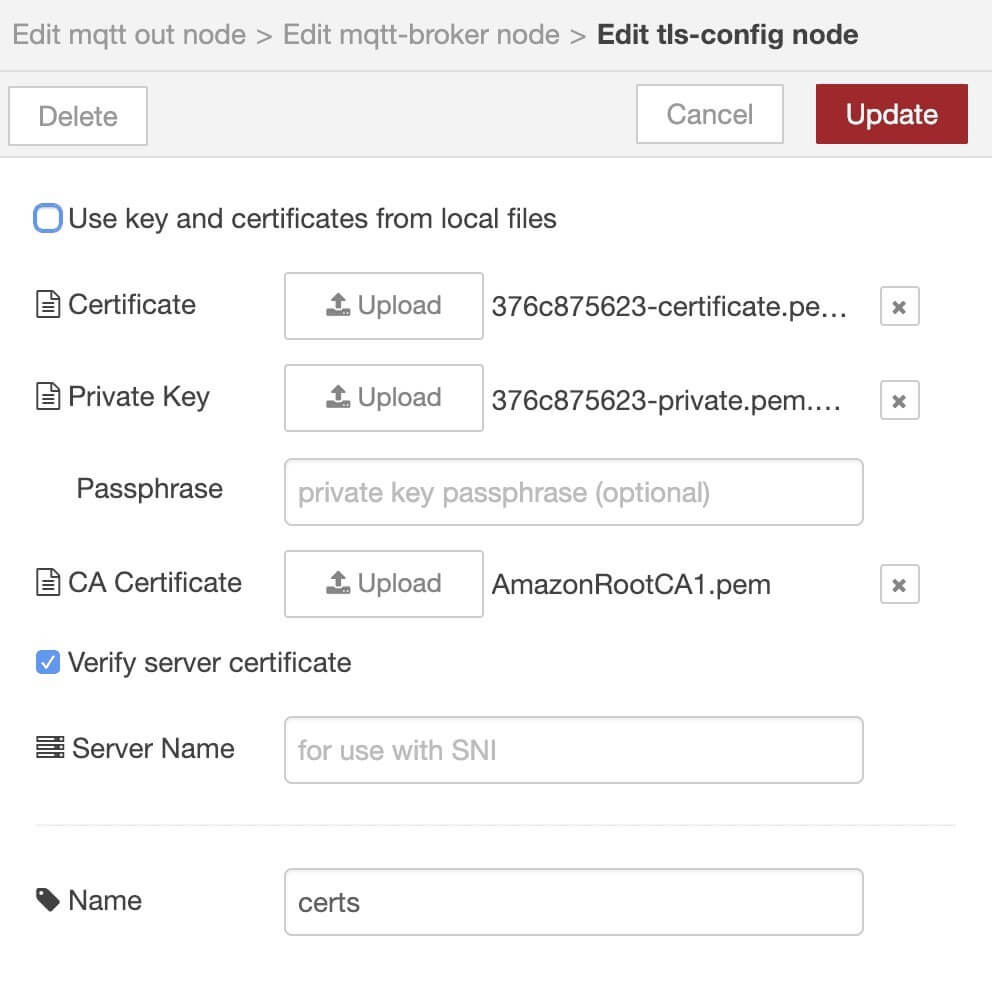
Certificate properties
All the necessary certificates can be found in the AWS IoT console.
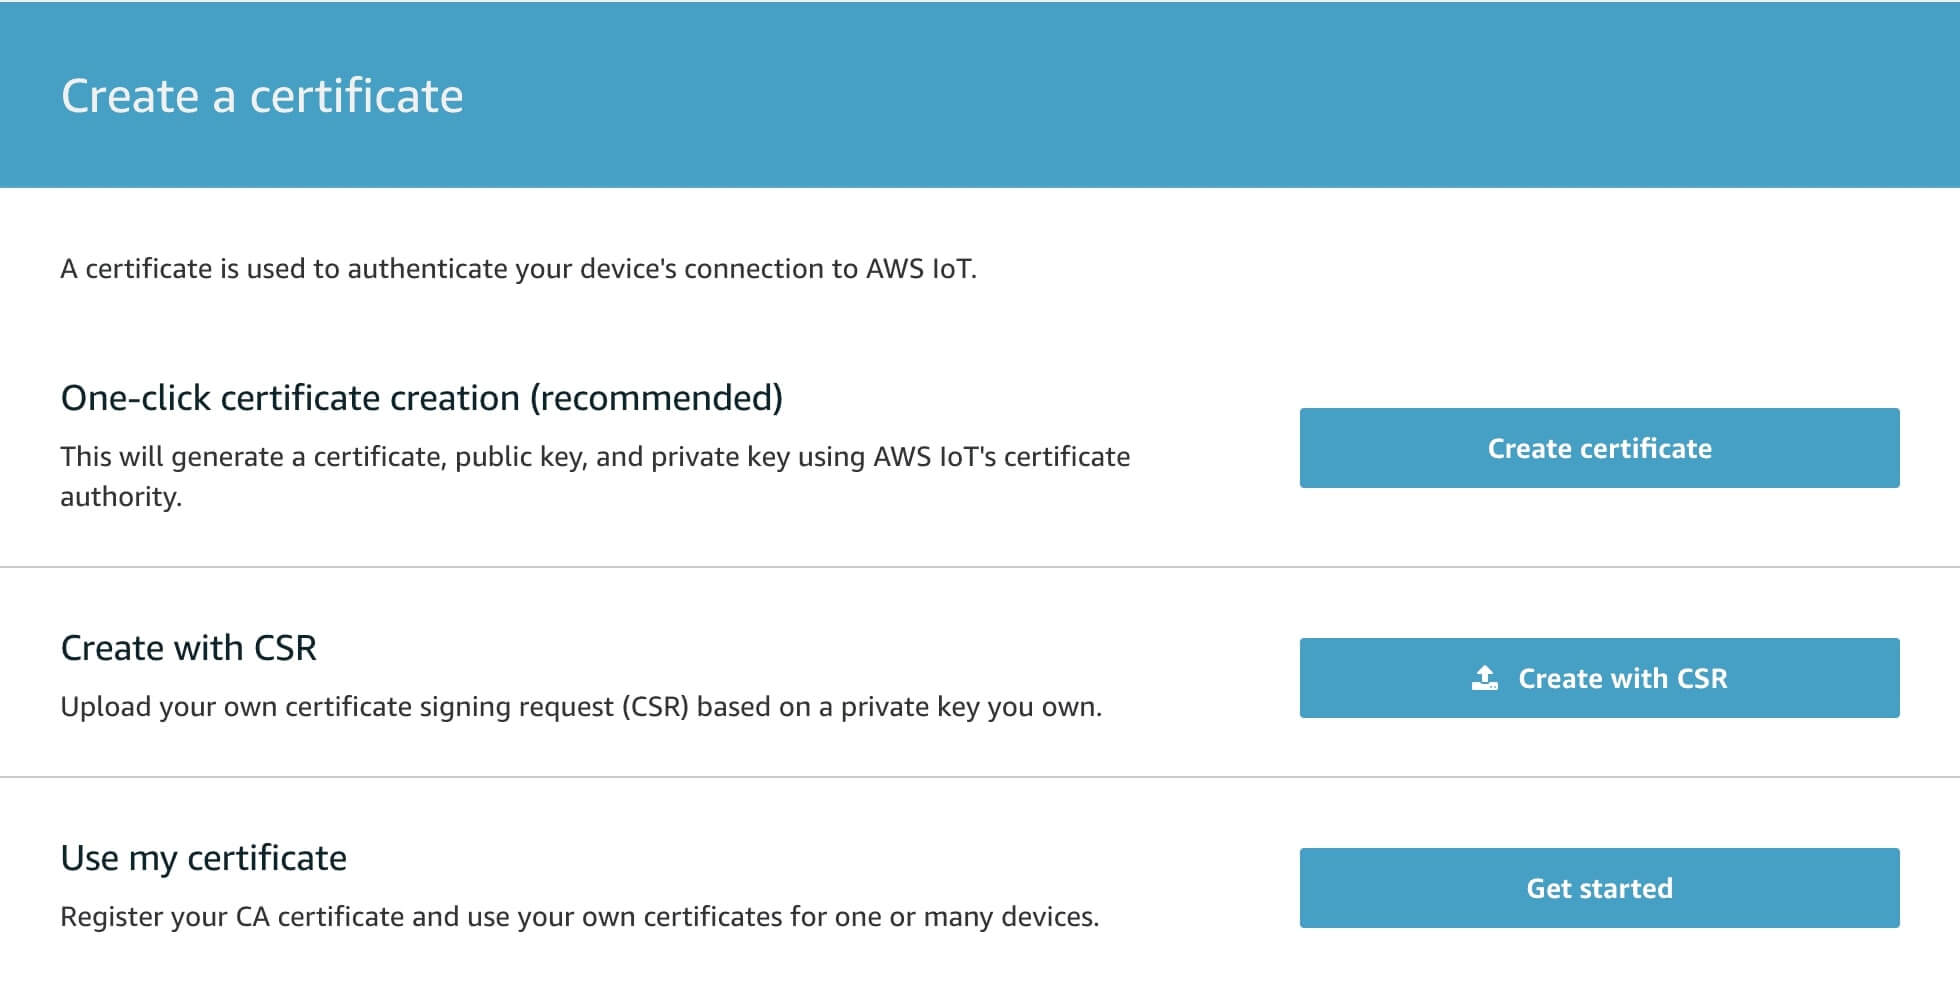
AWS wizard to create a certificate
The last thing you need to do is to deploy the flow by clicking the “Deploy” button.

You can check how the telemetry data comes to Azure and AWS IoT platforms.

The Azure IoT hub explorer

The AWS IoT console
Should you have any questions about how you can put this method to work with the telemetry data collected by your IoT networks, please don’t hesitate to get in touch.
By Sergii Bielskyi, Cloud Architect at ELEKS.
Related Insights


The breadth of knowledge and understanding that ELEKS has within its walls allows us to leverage that expertise to make superior deliverables for our customers. When you work with ELEKS, you are working with the top 1% of the aptitude and engineering excellence of the whole country.

Right from the start, we really liked ELEKS’ commitment and engagement. They came to us with their best people to try to understand our context, our business idea, and developed the first prototype with us. They were very professional and very customer oriented. I think, without ELEKS it probably would not have been possible to have such a successful product in such a short period of time.

ELEKS has been involved in the development of a number of our consumer-facing websites and mobile applications that allow our customers to easily track their shipments, get the information they need as well as stay in touch with us. We’ve appreciated the level of ELEKS’ expertise, responsiveness and attention to details.

